Tuesday, August 31, 2010

Welcome Christmas


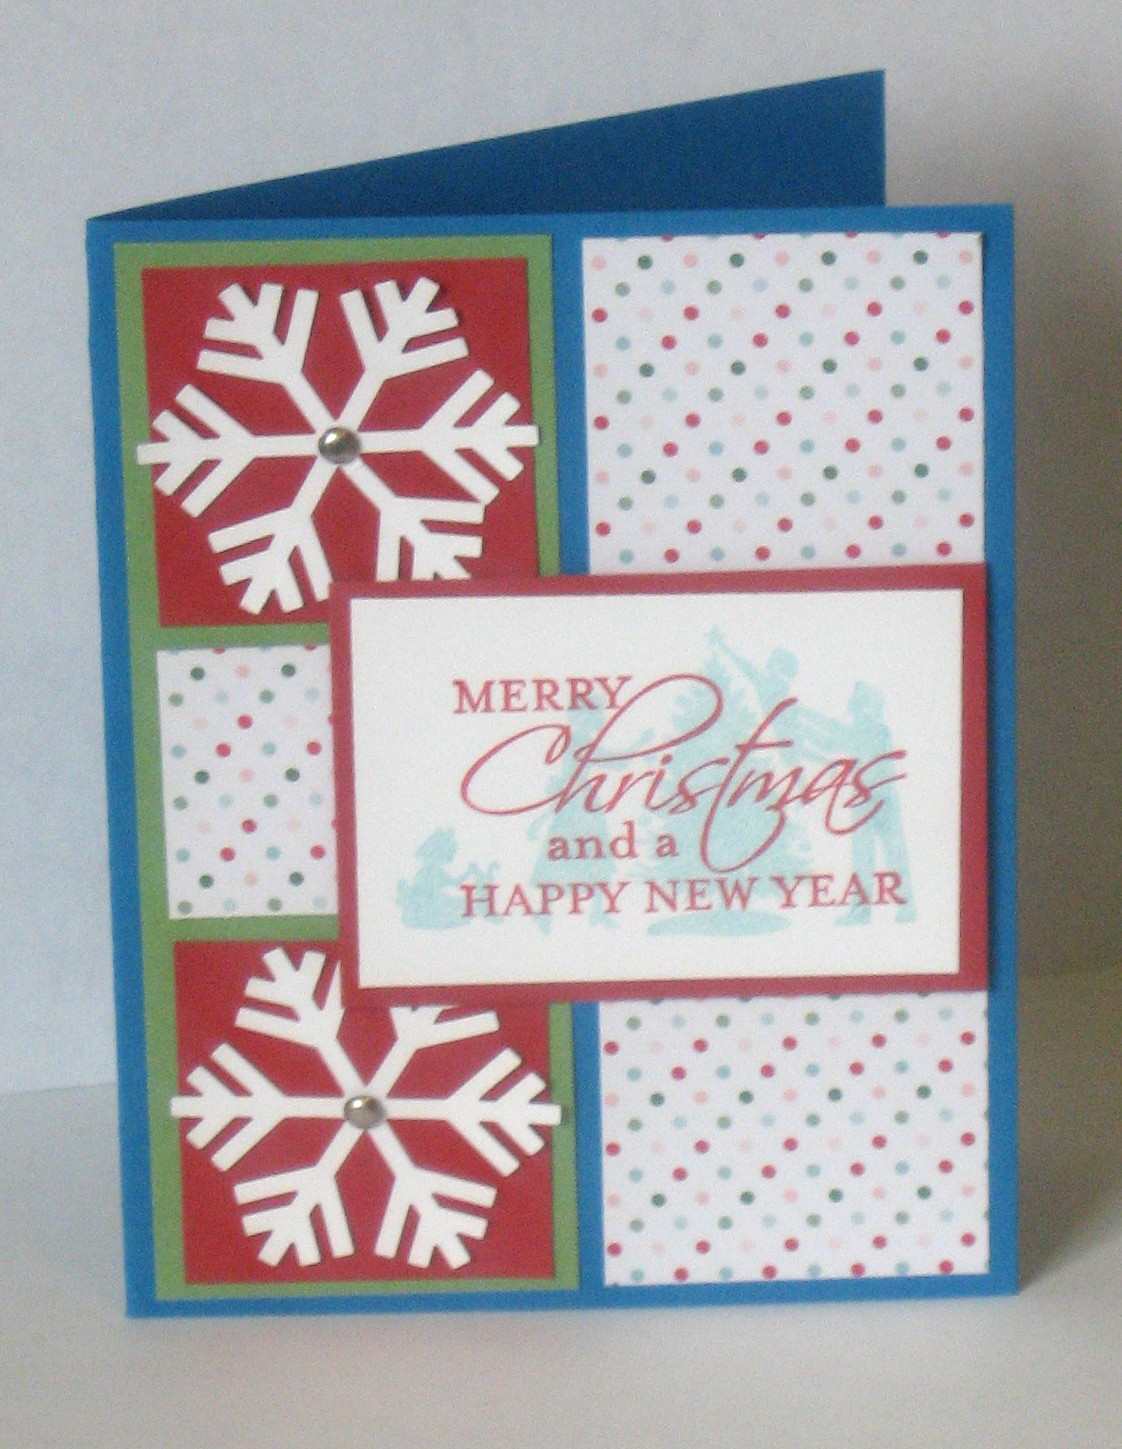
Here is another Christmas card! This is done with the set "Welcome Christmas" out of the big catalog.
Stamps: Welcome Christmas (Big Catalog), Seasonal Sentiments (Mini Catalog)
Paper/Ink: Wild Wasabi, Riding Hood Red, Baja Breeze, Whisper White, Candy Cane Christmas Designer Paper
Punches: Snowflake Punch

Monday, August 30, 2010

Stamp Space


I thought I would post some pictures of my stamp space today. I switched rooms last year and have been having a hard time trying to fit in the 10 foot by 10 foot space. I think I have it mostly worked out now I just need to take the time to clean it once in while so I can use it :)


The bookshelf is one I picked up at a yard sale. I just put extra plugs in all the holes and cut out foam board to use as shelves going down the entire length. I have a folder on top of each slot that is for scraps and the whole pieces under it. This works great for me because I have no patience for filing anything!


The other shelf is one my mother in law saved from an office remodel. My husband added the shelves and it works great. Everything is right in reach. This is where I store my 12 X 12 paper, stamps, catalogs, and a lot of other things. The stamp pad holder my father-in-law made for my birthday a couple of years ago. Having the markers stored by the stamp pad is such a time saver!!!


Sunday, August 29, 2010

Autumn Days

Sorry, I was out of town this weekend so I have to post a card from last year. This is from the set "Autumn Days" that was new to the catalog last year. To get the color variation on the bird just color directly on the bird stamp with the markers. The wheat was stamped and then stamped again without rinking to get the lighter and darker colors.
Tomorrow school starts so hopefully I will get a chance to get some stamping done while my littlest one takes a nap and my big girl is at first grade!

Thursday, August 26, 2010

Love the Owl Punch

I just can't stop using the new Owl Punch!

Stamps: Smarty Pants, Teeny Tiny Wishes
Ink/Paper: Basic Black, Pumpkin Pie, Basic Gray Whisper White
Big Shot: Polka Dot Embossing Folder
Punch: Old Punch

Wednesday, August 25, 2010

Holiday Happiness

OK so what do you think of Purple, Red, Green, and Yellow together for a Christmas card?
This card is made with a new set from the Idea Book and Catalog called Holiday Happiness. I bought this set in clear which made it really nice to get those ornaments hung on the tree. No floating ornaments...yeah!!! The big ornaments came from the "Delightful Decorations" set.
With the matching ornament punch this card went together quickly!
Stamps: Holiday Happiness, Delightful Decorations
Paper/Ink: Perfect Plum, Wild Wasabi, Riding hood Red, Daffodil Delight, Whisper White
Punches: 3/4 Circle Punch, Ornament Punch

Tuesday, August 24, 2010

More Santa Cards


Here is another card with the "Jolly Old Saint Nick" set from the Holiday Mini. So far I have really only played with the Santa image but I am going to have to move on to the snowman soon. I think he is really cute.
Stamps: Jolly Old Saint Nick
Paper/Ink: Early Espresso, Cherry Cobbler, Very Vanilla
Punches: Scallop Oval
Big Shot: Polka Dot embossing folder
Ribbon: 1/8 Taffeta Ribbon


Monday, August 23, 2010

1st Day of School

This is going to my daughter's new teacher on her first day of school. The pencils are already sharpened and put in a floral foam to hold them in place. The Owls are done with the new Owl Punch in the Stampin' Up Idea and Catalog. The vase came from the dollar store. I think the whole project cost me under $3.00.

I used to teach 1st grade and I know how valuable sharpened pencils can be. Do you know how long it takes 6 year old to sharpen a pencil!!!

Sunday, August 22, 2010

Time to Start!


Christmas camps always creep up on me so fast I am starting early this year. Here is my first card done with the Stampin' Up set "Jolly Old Saint Nick". This is a set out of the new Mini Catalog that is available Sept. 1st.
Supplies:
Stamp Set: Jolly Old Saint Nick
Colors: Baja Breeze, Riding Hood Red, Basic Black, Whisper White
Punches: Scallop Oval, Decorative Label Extra Large Punch (Holiday Mini), Snowflake
Designer Paper: Candy Lane Christmas (Holiday Mini)


Thursday, August 19, 2010

Do You Count Your Trick Or Treaters?


This is a board to count the Trick Or Treaters we have on Halloween. My grandpa used to keep track how many he had and would call my dad to see how many he had throughout the night on Halloween. Now that I have a family it is tradition to count the trick or treaters and call my dad and compare.
This board is made out of a 12 x 12 piece of tin that I got at Craft Warehouse. I then glued it the paper on it. I used the paper from Stampin' Up! called "Wicked Fun". This was so easy because this paper is already designed with the raised bats on it. I did nothing! Then I punched holes using my Crop-A-Dile that went right through the tin and paper.
Holding on the notebook paper to keep track on the trick or treaters is the magnet I posted last week.
On the back of the board I am going to write our address, year, and how many trick or treaters we had each year before I put it away. I think it will be a fun thing to pass down to my kids some day. I just love traditions and holidays!

Wednesday, August 18, 2010

Tree Card


I have been using a lot of my new stamp sets but here is a card done with two of my favorite old sets. This uses "Season For Friendship" and "Trendy Trees".

Tuesday, August 17, 2010

Morning Cup


This card is done with the new Stampin' Up! set "Morning Cup". I have been waiting for them to come out with a new coffee set and here it is!
I can't wait to have some more time to play with this set!

Monday, August 16, 2010

Candy Tin


I made this Halloween Candy Tin out of a tin I picked up at Target for $1.00.
I filled it with a floral foam and then covered it with paper that I crimped and then put through my shredder. Then I glued the candy on Popsicle sticks and arranged them in the tin.
The Stampin' Up! supplies I used were...
Owl Punch
Large Scallop Punch
Circle Punches
Wicked Fun Designer Paper
1 1/4 Stripped Grosgrain Ribbon
Old Olive, Pumpkin Pie, Elegant Eggplant Markers
Stamp Sets...
Batty For You
Gratefull Greetings

Sunday, August 15, 2010

My Digital Studio


Here is another page made with My Digital Studio. This is such an easy way to scrapbook! These are pictures of my son picking huckleberries while we were camping last year. He LOVES huckleberries!

Wednesday, August 11, 2010

Glitter Spider Web


This is another card using the Spider Web embossing folder. I embossed two of these and then cut them down to make them smaller. Then I sprayed them with Smooch Spritz. It is hard to tell from the picture but the webs looks almost like sparkly leather. Then It is layered on the Haunted Hill jumbo wheel image and colored with Stampin' Up Markers, and blender pens.
Basic Black
Cajun Craze
Old Olive

Tuesday, August 10, 2010

Spider Web Embossing


I just got my new Spider Web Embossing Folder. It is so fun to use, and is going to be great for Halloween cards.
This card is Old Olive, Razzleberry, and Black. It also uses the new Stampin' Up Halloween Designer paper.

Monday, August 9, 2010

More "Elements of Style"


Here is another card done with the stamp set "Elements of Style". This one was done with More Mustard, Always Artichoke, and the new color Cajun Craze.
My new Stamp order comes tomorrow with my new Christmas sets and the rest of my Halloween goodies. I can't wait!

Sunday, August 8, 2010

New Set, "Element of Style"


This a set called "Elements of Style" from the Spring Mini that I just got. When it made the big catalog I couldn't wait any longer. It is done in Crumb Cake (what used to be Kraft), Vanilla, and Espresso.

Saturday, August 7, 2010

New Owl Punch

This is my first card with the new Owl Punch. This is also my first Halloween card this year. I always think I am starting early and then before I know it Halloween is here and I am way behind! So Boo... or in this case I guess it is Yeah!!! One Halloween card done for me!

Tuesday, August 3, 2010

Halloween Magnet


Here is a quick fridge magnet for Halloween. This uses the new magnet sheets that are in the new Stampin' Up catalog. You send it through the big shot with the top note di and you get a top note shaped magnet. Then you just decorate it and the magnet sheet is self sticky so you peel off the backing and stick it on. I love these magnet sheets. Really easy to use and really sticky. These could hold up pretty heavy things on the fridge (like my 1st graders art projects that use a LOT of glue).